App Guide
On this page you can find out how to get our app, the key features you’ll love our app for.
As well as FAQ support related to our app, from creating and accessing your account, to using & booking through our app.
App FAQ Support
Quick & Easy access to:
- Track your driver and safely see who's picking you up (Drivers name, car type and registration)
- Promo codes
- Your loyalty reward points (you automatically receive on all bookings) which you can use for money off any future bookings.
- Pay with a Card, Apple/Google Pay or select to just pay the driver.
- See your scheduled and completed journeys
- Save a home and work address for quickly booking a driver to either of your regular locations.
- Instant (& fixed) pre booking prices for any journey.
- Being picked up and taken home from any location (even when you don't know where you are), by quickly selecting your saved home address.
- Journeys you saved as favourites, making booking super quick for regular journeys.
- Quick access to call our team at any time
If you have already created an account with Xoom; even ones created through the booking system on our site; you can use your login email and password to login on our app.
If you don't have an account follow these simple instructions:
- Click 'Sign up' at the bottom of the sign in page.

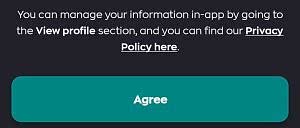
- You then need to 'Agree' to our privacy policy to continue so the app can store the account details you are about to enter. A link to read the privacy policy is provided on the page or can be read here: https://banuscafe.com/privacy-policy/.
- Enter your 'Mobile number' (+44 is used instead of the 0 in your mobile number, so add everything after the 0 in your number).

You will then be sent a verification code to the entered mobile number, once you have received the code, enter it into the field on the app to verify your mobile.
Then press the tick or enter on your keypad to move on to the next page.
- Please enter your 'First name' and 'Last name' in the relevant fields, these will be used to identify & address you in the app and by drivers you book.
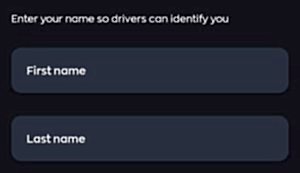
Then press the tick or enter on your keypad to move on to the next page.
- Enter your 'Email' and 'Password' you want to use for logging into your account, in the relevant fields.
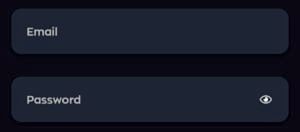
Your password must contain at least one letter, one number, one special character and be at least 8 characters long.
Then press the tick or enter on your keypad to move on to the next page.
- You will need to accept both out T&Cs and Privacy Policy, links to both to read are available on the page or can be read here:
https://banuscafe.com/terms-and-policies/ & https://banuscafe.com/privacy-policy/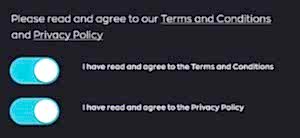
Make sure both options are blue like above and then press the tick or enter on your keypad to move on to the next page.
- You can choose to enter a payment card detail on this page which will be saved for quicker payments on any bookings you make, or you can choose to skip this step by pressing the skip button at the bottom (You can still use Apple Pay/Google Pay if setup on your phone and you also have the option to add a payment card to your wallet after you've created your account)
To add a payment card now enter your card details, by adding your 16 digit 'Card number', it's 'Expiry date' and it's 3 digit 'CVC' security number from the back of your card into the relevant fields.
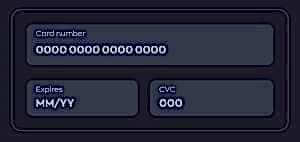
Then enter registered details for the card by adding the 'Name on the card' the 'Address', 'City' & 'Postcode' that the card is registered to in the relevant field. Finally select the country the card is registered to.
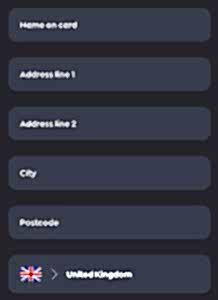
Then press the tick or enter on your keypad to move on to the next page.
- You can choose to upload an image or take one with your camera, to use as your profile picture. You can also choose to skip this step with the Skip button at the bottom of the page (You can add a profile picture later once your account is created).
To add a profile picture now just click the 'Plus icon' in the centre of the profile circle and select your camera to take a picture to use, or select one of the other options to choose how to find a profile picture from your device.
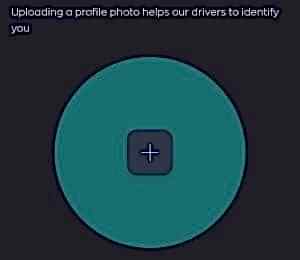
Then press the tick or enter on your keypad to move on to the next page.
- Accept the 'Locations permission' access by clicking the 'Green tick icon'. This is necessary for the app to be able to:
- Find your current address
- Find Nearby Taxi's
- Allow the Taxi Driver to locate you on a booking.
Depending on your device you may be asked to manually enable access to your devices location, please select 'While using this app' if so.
You have now completed your account setup and will now see the main home screen of the Xoom app.
Quick booking options and setting favourite addresses
From the app home screen you have 4 quick options available to select:
- The 'Where are we going' option lets you add an address or postcode for a destination.

- The 'Home' option sets the destination as your saved home addressed. If you haven't saved a Home address, then the first time you click this option it will ask you to enter the address details to save it for quick future use.
- The 'Work' option sets the destination as your saved work address. If you haven't saved a Home address, then the first time you click this option it will ask you to enter the address details to save it for quick future use.

If you drag the box containing these options up to fill the screen you will also get a 4th option which will allow you too select from the destinations you have saved as your 'Favourites'. This option will again show your saved Home and Work addresses but if you want to add any other address to your favourites list, simply click the plus icon in the bottom right and search for the address to add.
If you select 'Home', 'Work' or a destination from your 'Favourites', once clicked it will be chosen as your destination and give you details about the vehicles available, the price and other information to book your driver. If you select the 'Where are we going?' option you need to search for a destination address (To), and also a Pickup destination (From) if you want it to be different from your current location the app has detected.
Booking options
Once you've picked your destination you will be presented with a map at the top showing you your selected pickup and destination, with a live update of the journey time based on current traffic conditions (our smart GPS system will make sure we are using the quickest routes to avoid as much traffic as possible, saving wasted energy and time for you to get to your destination).
Below the map you have a number of options to personalise your booking & ride.
Choosing your vehicle
The app will default to showing you the nearest vehicle to you and the time it should arrive with you. You can swipe to the left to see other types of rides available as you may you want a saloon, a black cab or need a lot more room in one of our Minibus options.
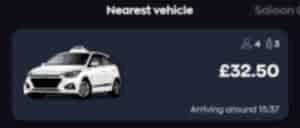
Updating the vehicle choice will also update the price and time of arrival.
Schedule your booking for a different time/date
Clicking the Time icon will open up a page that will let you select a 'Date' and 'Time' for a ride to come for you.
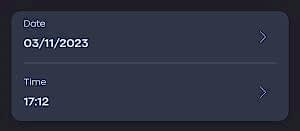
Once you've set your date and time click the 'Set schedule' button to add it to your booking.

Apply a promo code or use your loyalty reward points for a discount on your booking
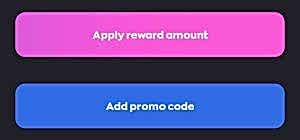
Clicking the 'Promos & rewards' icon will bring up two options you can use.

Clicking 'Apply reward amount' will let you use your loyalty reward points on your current booking, alternatively if you have one you can click the 'Add promo code' button to enter a promo code for a discount off your current booking.
Add a note for the driver
Do you need help with your luggage or need to add some further directions for the driver? You can simply add notes for the driver you are booking by clicking the 'Note' icon

On the apps home screen you can access a menu of options by clicking the 'Menu' slide out button in the top left

Then to see your scheduled rides, click the 'My rides' option
You will then be able to access a list of all your Scheduled and Completed rides.
On the apps home screen you can access a menu of options by clicking the 'Menu' slide out button in the top left

Then click the 'My Wallet' option

Which will bring up all your currently available payment options (Like Apple/Google Pay, any Payment cards and the Pay in taxi option).
To add a new payment option to your wallet, click the green 'Plus' icon in the bottom right

This will allow you to enter all the details in for your new payment card

Once you've entered all the details, simply click the green tick to save the card to your wallet
On the apps home screen you can access a menu of options by clicking the 'Menu' slide out button in the top left

Then click the 'My favourites' option

You will then be shown any saved favourites, including a 'Home' or 'Work' address (if you haven't saved a home or work address, you can click the plus icon next to either to add one, or if you have added addresses and want to update them, then click the pen icon next to one to update it's address).
If you want to add a new address to your favourites, click the green 'Plus' icon in the bottom right

Then simply use the address search functionality to find the address you want to add
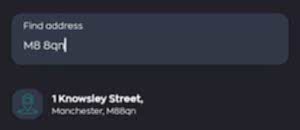
Once selected, you need to give the address a memorable name to identify it in the list of favourites
Finally click the green 'Tick' icon in the bottom left to add the address to your favourites

Every time you book a ride with Xoom you'll receive credit back in the form of loyalty reward points which can be used on any future bookings.
To use your loyalty reward points, during the process of booking a ride click the 'Promos & rewards' icon

Then selecting 'Apply reward amount' will let you use your loyalty reward points on your current booking
On the apps home screen you can access a menu of options by clicking the 'Menu' slide out button in the top left

Then at the top of the menu click on the 'View profile' options just below your name
![]()
You will then be presented with fields that can be clicked on to let you change your:
- Profile picture
- First name
- Secondary name
- Email address
- Contact number
- Password
When you try to change any of these details (except profile picture) you will also be asked to enter your current password to confirm it's really you making these changes for security.
Click the green 'Tick' icon to confirm the changes

On the apps home screen you can access a menu of options by clicking the 'Menu' slide out button in the top left

Then at the top of the menu click on the 'View profile' options just below your name
![]()
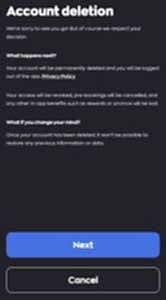
At the bottom of the list of profile options, is the option of 'Account deletion'
Clicking it will take you to a page with information on what happens if you delete your account and presents you with two options.
You can continue with the deletion by clicking the 'Next' button or press 'Cancel' to go back to the profile menu without deleting your account
